Happy Monday, ya’ll!
How’s everyone doing? It was bitterly cold here today. I opened the door to go outside to check on chicken eggs and immediately wanted to dive back inside (under a dozen blankets)! However, the sun was shining and next week holds the promise of 50 degrees, so I cannot complain too much. A mug of tea, a cozy sweatshirt, and a warm blanket later and I forgot about the nip in the air. Mostly.
In just a few days it’ll be St. Patrick’s Day. Do you have your green ready? On Wednesdays we may normally wear pink, but not this week! This week, on Wednesdays we wear green.
(I couldn’t help myself. 😉 The Mean Girls reference was practically begging to be slipped in!)
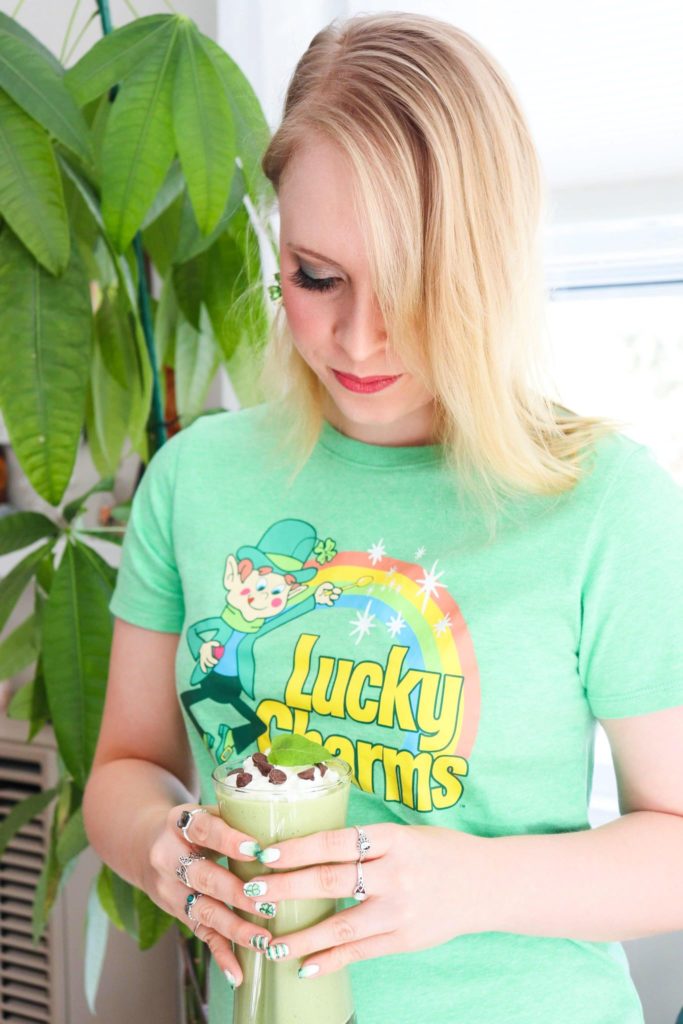
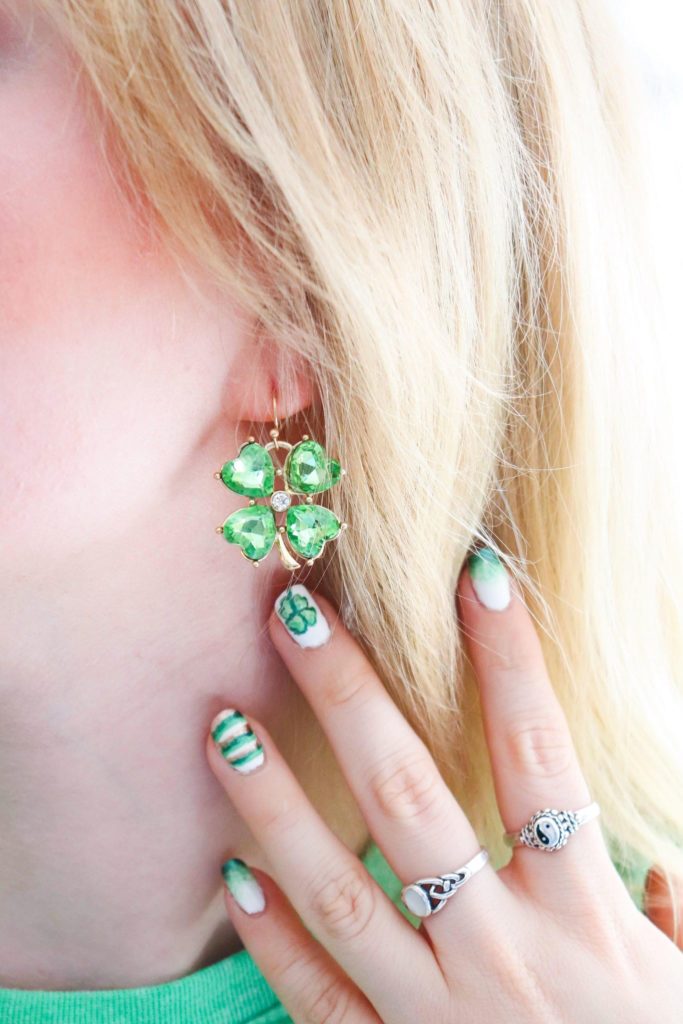
For years, I never had any green to wear! Green is one of my favorite colors and I never owned a piece of clothing with it. My green on St. Patrick’s Day was concentrated to two locations: my clover-themed earrings and green nails.
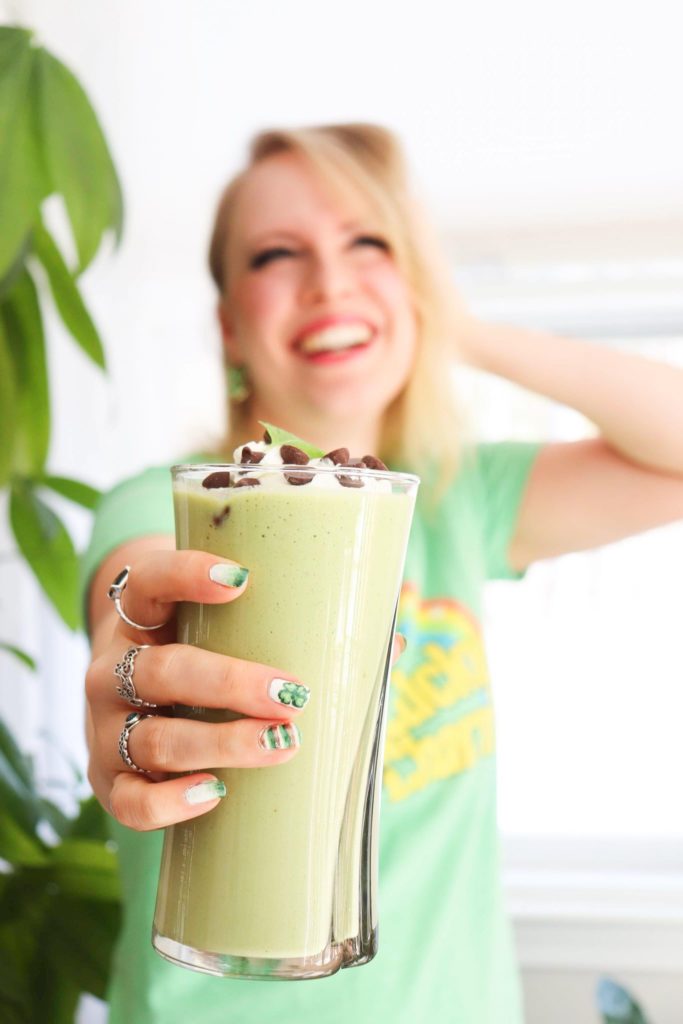
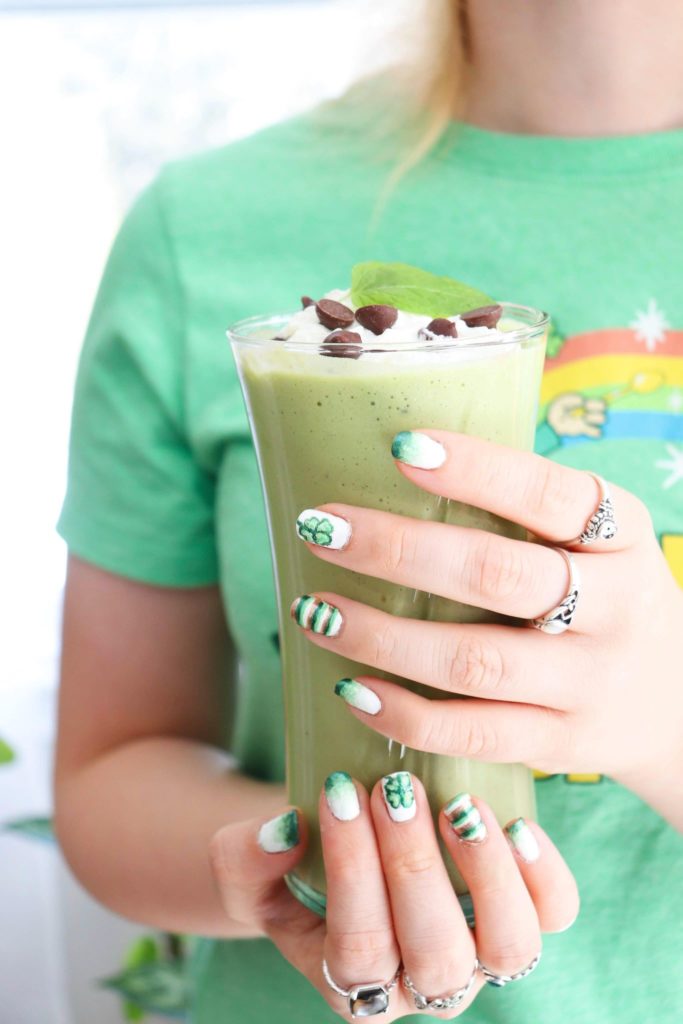
If you also don’t have any green on hand, this nail design has your back. You may have noticed these festive nails on Instagram over the past week, as well as in my post for my Minty Fresh Shamrock Shake and my soon-to-be post on St. Patrick’s Day pancakes.
Annaliese from Southern Belle in Training and I have been friends since our homeschool days. It is one of those beautiful friendships that you lose touch with for a few years when you’re both kids and then life serendipitously brings you back together (high school, for us!) and you’ve been friends ever since. ❤️ Like so many of the friendships I hold near and dear, I couldn’t imagine life without her presence.
Despite living states away we keep in touch and see each other at least one to two times a year. Especially at Christmastime. Every year, when she comes home for Christmas we meet up for brunch on Christmas Eve, where we exchange gifts and enjoy each other’s company for a few special hours. Sometimes a dear mutual friend also joins us. It’s a tradition that I look forward to every year. Even last year.
One of this last year’s themes was change. The pandemic led to many changes in our lives, our connections, our celebrations, our traditions. True to form our Christmas brunch had to change, too. But it was still so special! Instead of brunch or morning tea/coffee in person, we found ourselves connecting over Zoom later on Christmas Day.
We still exchanged gifts. Hers was so sweet and thoughtful. Nail design has been my go-to studying procrastination since undergraduate Biology examinations and that tradition held all through graduate school and boards exams. Annaliese has a talent for paying attention to details – and gift giving. She knows my proclivity for nail design and my lack of official tools for the job. So, she gifted me a nail design kit! Now instead of bobby pins and scotch tape I can use some actual tools-of-the-trade. 😉
She told me: “You already make such beautiful nails. I can’t wait to see what designs you make with these!”
I hope I’ve done her anticipation justice. ❤️
It took me a few months – January and February were fairly uneventful months due to excessive studying – but I’ve finally gotten to use her nail kit. I used it for the first time on these nails! And, oh my… I am completely might be obsessed with the kit now. (Don’t worry, though, I’ll still include the tips and tricks for those of you who don’t have a kit.)
This is a simple, but fun and festive nail design that has some room for flexibility depending on your skill level.
Here’s what I used for nail polish:
White – Alpine Snow (OPI)
Light Green – Glint of Mint (Mineral Fusion)
Medium Green – Gargantuan Green Grape (OPI)
Dark Green – Aurora Borealis (Mineral Fusion)
Gold – Golden-I (Sally Hansen Hard As Nails Xtreme wear nail color)
Top Coat – Top Coat (OPI)
Full disclosure – Some of the nail colors I use may not still be in production. I tend to keep my nail polish around for quite awhile as long as the quality remains. I’ve tried to add suggestions of replacement colors whenever possible. For any color that you cannot find, you can choose your favorite white and greens from your favorite nail polish line. I personally love OPI. I find the color lasts well before chipping and use it as much as possible.
Other supplies:
- Cotton Swabs *
- 100% Acetone nail polish remover* and cotton balls
- Nail Art Brush (or tooth pick)*
- Nail art dotting tool, small in size (or a toothpick or a bobby pin)
- Nail tape or regular tape (if you need a guide tool for the stripes)
- Nail Polish Thinner (optional)*
- Disposable makeup sponge wedges
Tips:
* Your fingers are going to get messy with this one! I recommend having a few cotton swabs on hand to dip into the nail polish remover so that you can be more precise with removing polish after your nails are finished.
* I use 100% Acetone because it doesn’t have any dyes or other additives. Historically, I used non-acetone nail polish remover, but I found with the newer gel nail polishes I was having to use more to remove the nail polish. Some days, it was like I was having to bathe my fingers in non-acetone remover and I was not comfortable with that excessive chemical exposure.
* If you use a nail brush, keep a cotton ball on hand and nail polish remover. After you use the brush you can dab it off onto a cotton soaked in nail polish remover to keep the brush clean and also pliable.
* The nail polish thinner returns polish to its original consistency, which is great for if nail polish gets clumpy or thick
Instructions:
- Apply 1-2 coats of white nail polish to all nails. Allow for thorough drying between coats.
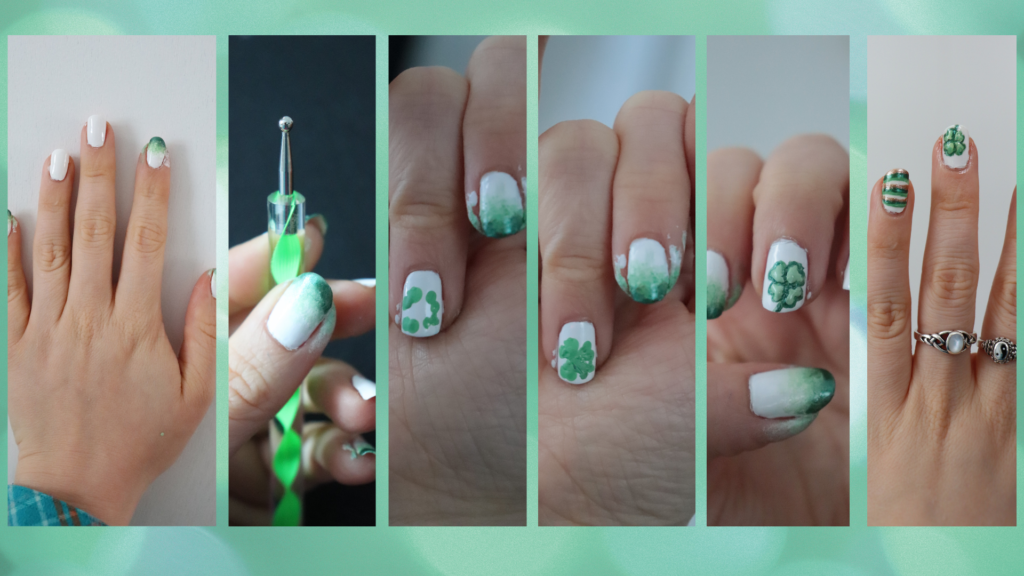
- Ombre Nails: Using your light, medium, and dark green nail polishes make the ombre design on your non-accent nails. This may take a few coats to get the desired texture and coloration. Don’t be afraid to add a little white to the nail (closest to the nail bed/above where your green is) in order to support blending. Here’s how I do the ombre: I start with a light coat of all four colors (white, light green, medium green, then dark green for closest to the tip) on the makeup sponge. I dab that along the nail to get the general shape and shade of the ombre. Then I progressively add slightly thicker layers of the green colors individually to get the proper blending. It is a little like painting: the first few coats look worst, but the image improves the more layers and blending you add. If you’re not confident with your nail design skills, then you can stick to this design for all of your nails and skip the accent nail OR you can continue on to your accent nails.
- Accent nails: For this design I did a clover on one nail – my largest/widest nail – and stripes on the other. You have some flexibility and variety in this design, though. If this combination doesn’t suit you, you can do one or two striped nails, one or two clover nails, one or two polka-dot nails using the template from Halloween Polka Dot nails (replacing the colors with two greens and a gold), or a combination of your favorite designs. Below I’ll share how I did my two accent nails.
- The clover: Using the lightest green and a smaller-sized dotting tool, toothpick, or rounded end of a bobby pin create 4 groupings of two dots where you’d like the clover to be. Each group of two represents one heart-shaped leaf of a clover. After the dots have been made, use your nail brush (or tooth pick) to connect the dots into heart-shaped leaves. Allow this to dry. Clean the nail brush. Using the nail brush (or toothpick) and the darker green outline the shape of the leaves/clover and add a tiny stem to the bottom.
- The stripes: Use your lightest green, darkest green, and the gold for this. If you feel comfortable you can free-hand the stripes. I freehanded all the light green stripes first using a nail brush, approximating the space I’d need for the rest of the colors, then did all of the dark green and all of the gold in succession. Remember to leave a white space after the gold! 🙂 If you are comfortable free-handing but don’t feel comfortable with being able to visually estimate the spacing, then you can do one cluster of light green, dark green, and gold at a time. Just be certain to wash your nail brush between colors. If you don’t feel comfortable free-handing the stripes wait until the white of your accent nail is completely dry. Use scotch tape or nail tape as the lower border of your stripes. You’ll use 8ish strips of tape per nail if you do this. Remember to leave a white space after the gold! 🙂 Allow the polish of each stripe to dry before removing the tape by pulling it away from you. Be certain to wash your nail brush between colors.
- Allow the accent nails to dry.
- Once everything has dried, add on the top coat, allow it to dry again, and you’re done! 🙂
Process Photos:
I’m more visual when conceptualizing something, so I took some photographs of the process as I went along. They’re what I use to remember my step-by-step creation for the future and for the instructions in this post. In case they’re helpful to you, too, I’ll leave them here for you to use. 🙂 Use them to orient yourself in the steps above. Use them in place of the steps. Whatever you need!

Happy Designing. ❤️ If you recreate this design or any of the others I post, tag me. I’d love to see them!
I’ll see you tomorrow with a fun gluten-free, grain-free St. Patrick’s Day-themed breakfast.
Xoxo,

love how you have tied everything together for St pattys day. Nails are lovely as are you. <3