Happy National Pumpkin Day!
Did you celebrate by enjoying something pumpkin? I ate a handful of roasted pumpkin seeds and made a homemade pumpkin spice latte. Though, I have to admit, those have both been happening a lot lately without a special holiday as an excuse. 😉
During distance education and post-graduation, one of my favorite things to get back into has been painting my nails. All through undergrad nail design was one of my favorite de-stressing activities. (And, sometimes, what kept me awake when studying subjects that I might otherwise nod off to…) It has been three years since I’ve been able to do that. Now, while studying for boards, I’ve rekindled that – uh – “productive procrastination.”
One of my board exams is on the 31st – Halloween itself! How could I not make some festive Halloween nail designs?
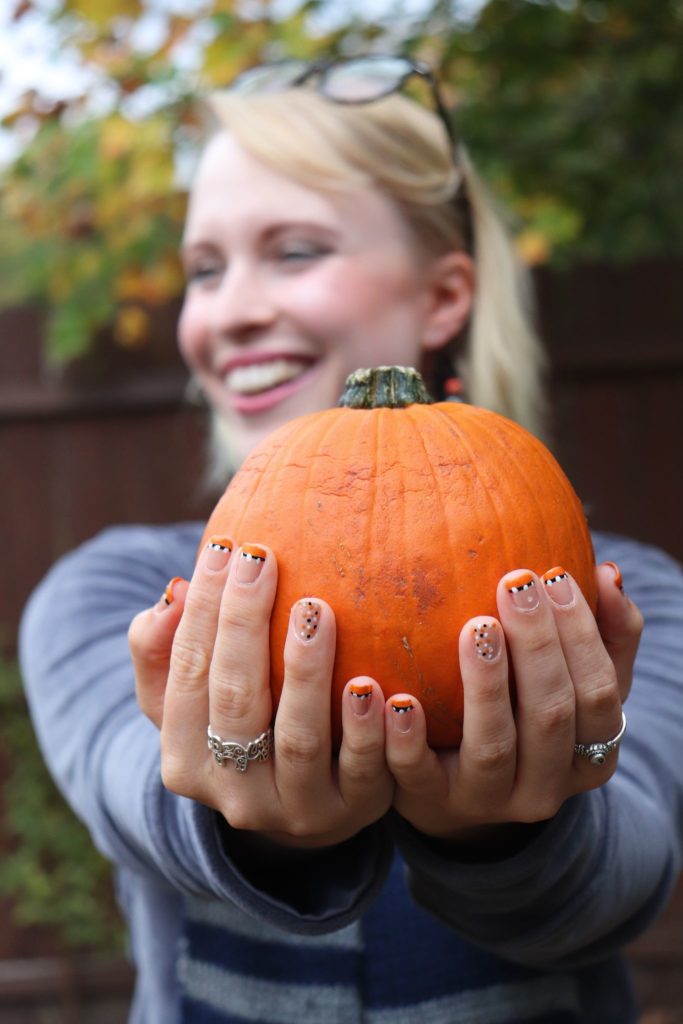
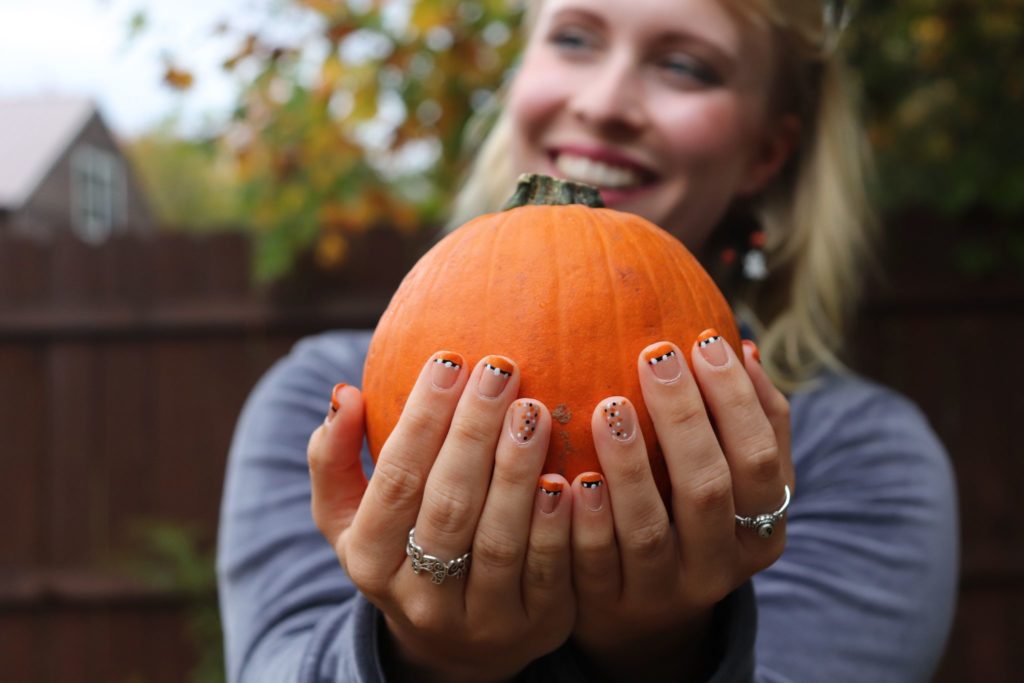
A few weeks ago I put out a poll on Instagram and asked if everyone would like to see tutorials for my nail designs and I got a resounding “Yes!” With boards, the timeline is a bit more delayed than intended, but, finally, here it is! In honor of National Pumpkin Day, I decided to start with my Polka Dot Halloween nails. They’re fun, simple, and so cute! A picture holding a pumpkin counts as celebration, right? Asking for a friend. (I should’ve made some pumpkin nails for ya’ll! Maybe next year.)
Full disclosure – Some of the nail colors I use may not still be in production. I tend to keep my nail polish around for a long time as long as the quality remains. I’ve tried to add suggestions of replacement colors whenever possible. For any color that you cannot find, you can choose your favorite nude, orange, white, or black polish from your favorite nail polish line. I personally love OPI. I find the color lasts well before chipping and use it as much as possible. (Also, a huge shout-out to my mom who agreed to let me take process photos on her nails when I’d forgotten to take them the day I painted mine.)
Here’s what I used for Nail Polish:
Nude– 0162 Pale to the Chief
Orange –410 Tangerine (Revlon)
Other suggestions: OPI’s No Tan Lines or Have Your Panettone and Eat It Too
White – L.A. Colors Art Décor White
If you do not have access to nail art polish or do not want the expense, a fine nail brush can be
used in your favorite bottle of white polish.
Black – L.A. Colors Art Décor Black
If you do not have access to nail art polish or do not want the expense, a fine nail brush can be
used in your favorite bottle of black polish.
Top Coat – Opi Top Coat 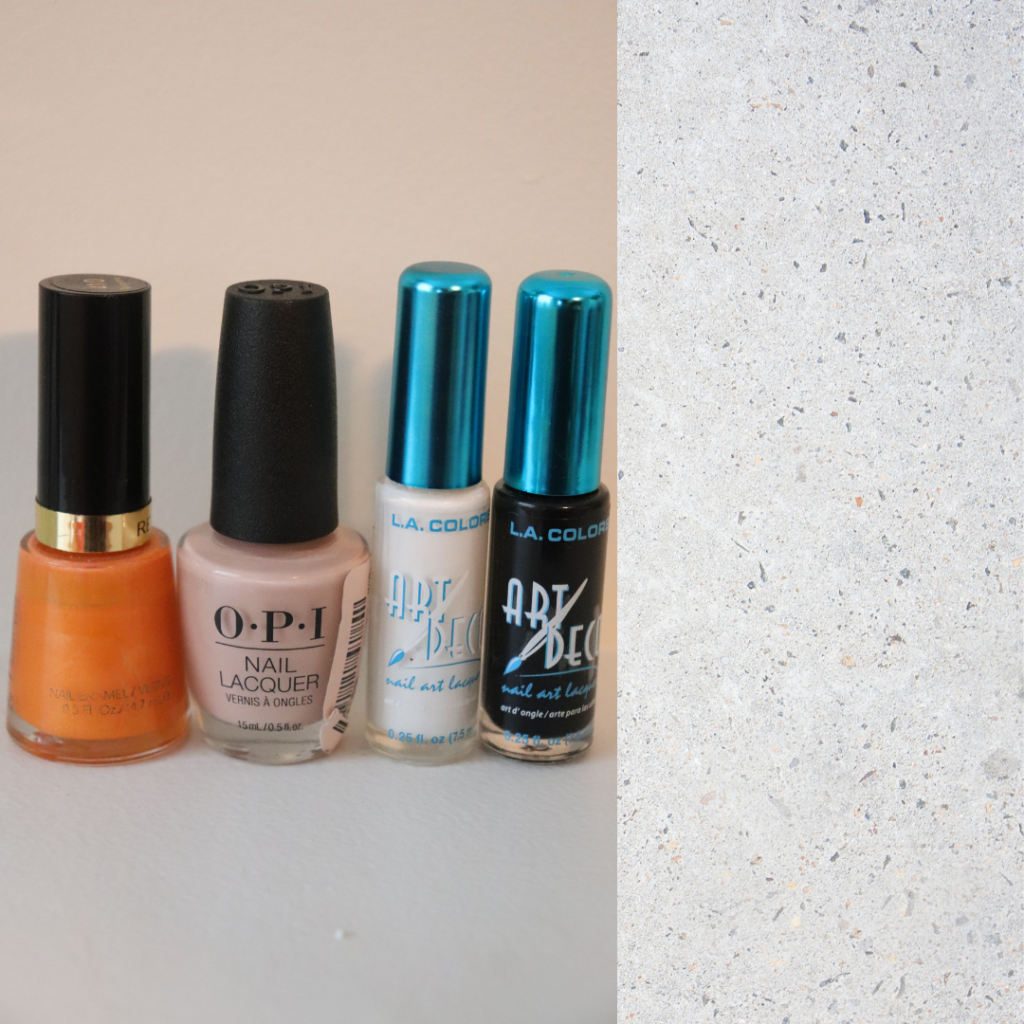
Other Supplies:
Vaseline and cotton swabs (optional)*
100% Acetone nail polish remover* and cotton balls / cotton swabs
Nail art brush (optional – if you do not have nail art polish) *
Nail polish thinner (optional) *
Tips:
* If, like me, you tend to get excess polish on your fingers when painting them yourself, putting a little Vaseline around your cuticles and skin around the nail bed prior to applying polish makes for a much easier clean up at the end. It decreases the need for cleaning up with nail polish remover. If you do not do this, I recommend having a few cotton swabs on hand to dip into the nail polish remover so that you can be more precise with removing polish after your nails are finished.
* I use 100% Acetone because it doesn’t have any dyes or other additives. Historically, I used non-acetone nail polish remover, but I found with the newer gel nail polishes I was having to use more to remove the nail polish. Some days, it was like I was having to bathe my fingers in non-acetone remover and I was not comfortable with that excessive chemical exposure.
* If you use a nail brush, keep a cotton ball on hand and nail polish remover. After you use the brush you can dab it off onto a cotton soaked in nail polish remover to keep the brush clean and also pliable.
* The nail polish thinner returns polish to its original consistency, which is great for if nail polish gets clumpy or thick.
Instruction:
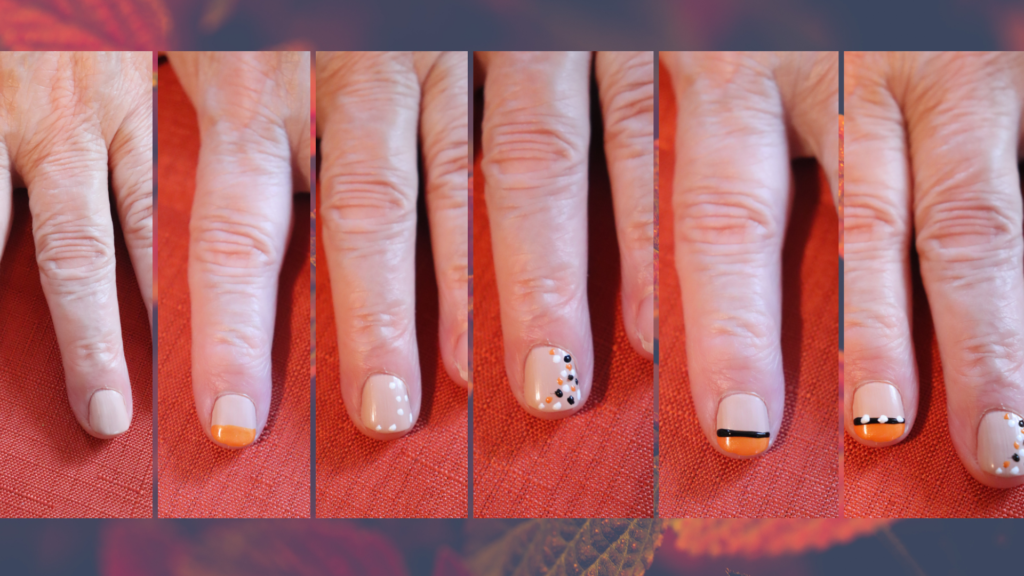
- Apply 2-3 coats of nude nail polish to both hands. Allow for thorough drying between coats.
- Make orange tips on your non-accent nails (2 ways). These can be as thick or thin as you wish. I like the orange taking up about 1/3 or ½ of the nail for this style, personally.
- 1 way: You can free hand this orange strip. When I do this, I find it easier to put a good amount of polish on the nail brush (not dripping, but not dry). I place the brush on the corner of the nail closest to me and drag in one horizontal motion toward the opposite side. Having a “medium” amount of polish on the brush will help the crispness of the line. Too little and the brush marks will show or the line be uneven.
- 2nd way: If you are not yet steady with your hand, you can wait until the nude polish is completely dry. (You don’t want it tacky or easy to leave an impression on). Take a piece of scotch tape and adhere it along the nail so it makes a horizontal line along your nail. Paint the area below it all the way to the tip. Allow this to dry, again. The drier it is, the better. Then slowly remove the tape starting with pulling from the end closest to you. You’ll have your orange tip!
- Allow for some drying time again, so you don’t smudge the nails.
- Once the nails have dried again – or while they’re drying, if you’re more coordinated than I am – move on to your accent nail. Here you’ll start with making dots. I chose to do about 5 or 6 per color, keeping them distributed across the side of the nail. Generally, I did 1-2 near the tip of the nail, 1-2 near the cuticle, 1-2 along the side. I started with white, then black, then orange to fill in the spaces.
- Back on your non-accent nail, make your black lines slightly above the orange tips. (2 ways)
- 1 way: You can free hand this black line similar to how you free-handed the orange tip. Whether using the nail art brush that came with the polish or another nail art brush with regular polish, align the brush so that its width abuts the orange tip. Start at the corner closest to you and drag in one horizontal motion toward the opposite side. If the brush tip is long, you may not make it all the way to the opposite side. That’s okay! Lift the brush, dip it back in the nail polish, and, starting at the side of the nail opposite to you, drag the brush again until the lines connect.
- 2nd way: Use scotch tape to determine the thickness of the line you want above the orange tip. Take your nail art brush with black polish and drag it along this space. Allow it to dry before removing the tape, starting from pulling from the end closest to you.
- Allow the black stripes to dry.
- Using white nail art nail polish, create three circles on top of the black stripe. Start with the center dot and then add one on either side. TIP: If you have difficulty making the circles you can dip the rounded end of a nail brush (or a thin pain brush) handle into white nail polish and use it to make the circle, they’ll just be a little larger than mine.
- Once everything has dried, add on the top coat and you’re done! 🙂
Happy Designing!
Xoxo,